Usage
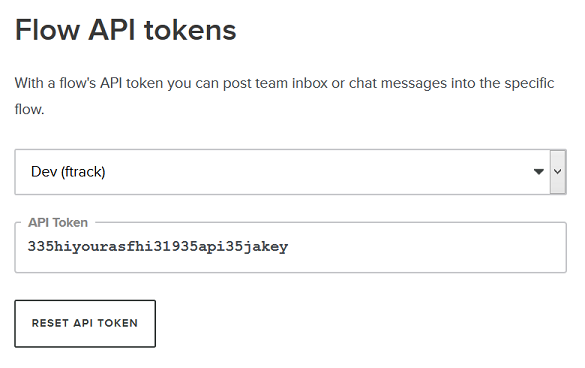
Once installed you need to grab a relevant API token from Flowdock. Go to https://www.flowdock.com/account/tokens and copy an appropriate token (for example, a token for a flow called ‘Dev’):
Then start the Bitdock service from the command line passing your copied API token as the sole parameter:
python -m bitdock [YOUR_FLOWDOCK_API_KEY]
Note
To see additional runtime options (such as setting host and port interface) use:
python -m bitdock --help
Now the server is up and running it is time to head over to the Bitbucket project you want to receive notifications for. Once there, navigate to the page and add a new Pull Request POST hook.
Check only the Create / Edit / Merge / Decline option and then enter the full public URL to your running server adding ‘/bitbucket-pull-request’ at the end. For example:
http://example.com:9000/bitbucket-pull-request
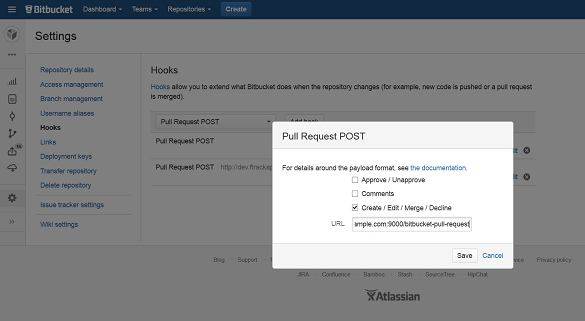
Click Save.
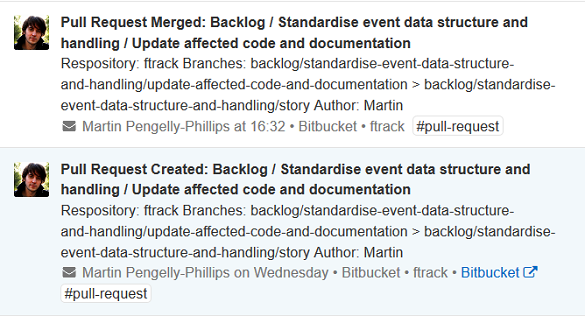
Now whenever a Bitbucket pull request is created or updated you should see a new entry in your Flowdock inbox for the configured flow.
Note
Assigned reviewers will show up as people tags on the inbox entry.
Mapping Users
As folks may have different user details on Bitbucket and Flowdock there is a basic way to map from one to the other. Start the server passing in a path to a JSON file containing mappings or Bitbucket usernames to Flowdock user details. For example:
my_mappings.json
{
    "martin": {
        "username": "mphillips",
        "display_name": "Martin Pengelly-Phillips",
        "email": "martin@example.com"
    },
    ...
}
Run the server using:
python -m bitdock --user-mapping my_mappings.json